
It’s the worst part of making the best detectors: meticulously curating a robust set of training images that prepares your detector to recognize the things you care about in the real world. Unfortunately it’s also the most important part of creating detector; if it’s garbage in, it’ll be garbage out, regardless of how state of the art your model is. Luckily, Matroid has a host of features that make training image curation as painless as possible.
Adding training images
Gathering good training images can be a tedious process, but Matroid has some tools to give you a head start. When you’re creating a detector, you have the option of using Matroid stock images:

If you choose this option, the studio will automatically be populated with pictures that match your labels from Matroid’s internal image bank.
You can also choose to add your own images in the studio. On the upload examples tab, you can add images from a variety of sources:
- Local image files
- Local video files — when you upload a local video, you’ll be able to select specific frames with our custom video frame selector
- Images from your webcam (useful for making a face detector for yourself!)
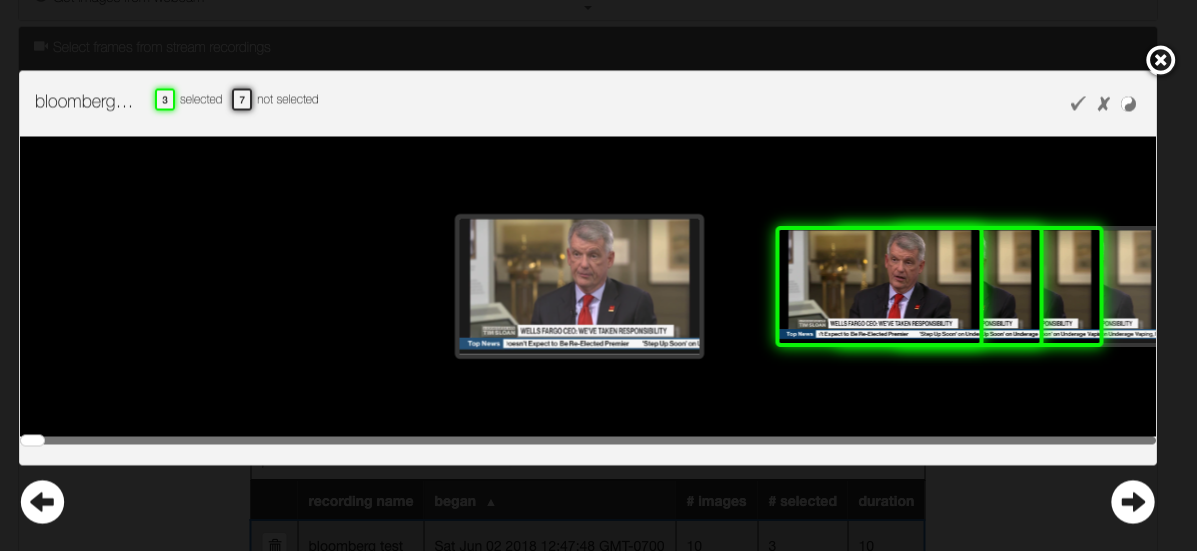
- Frames from recordings of your Matroid streams. These can be particularly useful for collecting relevant training examples if you know that you’ll be monitoring a certain stream with your detector
You can also upload your training data as a zip file via our create detector API. The zip file should be a compressed set of directories of images. The name of each directory should be the name of a label for your detector. You can also include bounding box annotations. After using the API, you’ll still be able to annotate your images in the studio before training.
Learn more about our public api.
Curating images
Once you’ve added your training images, you can easily select, deselect, and annotate training images. You can select or deselect an image by clicking on the thumbs up / down icons in the top left corner of an image:
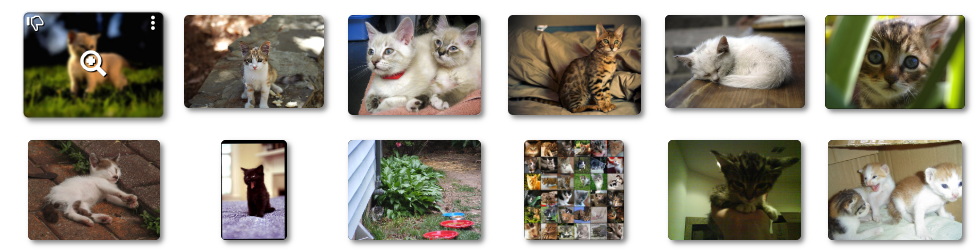
You can also select or deselect multiple images using the shortcut icons at the top of the studio. Deselected images will not be used for training.
Sometimes, your training images will have extraneous details beyond the object of interest. In these cases, it is crucial to annotate your image so your detector knows what to focus on when training. Annotations are particularly important when you’re training an object localizer.
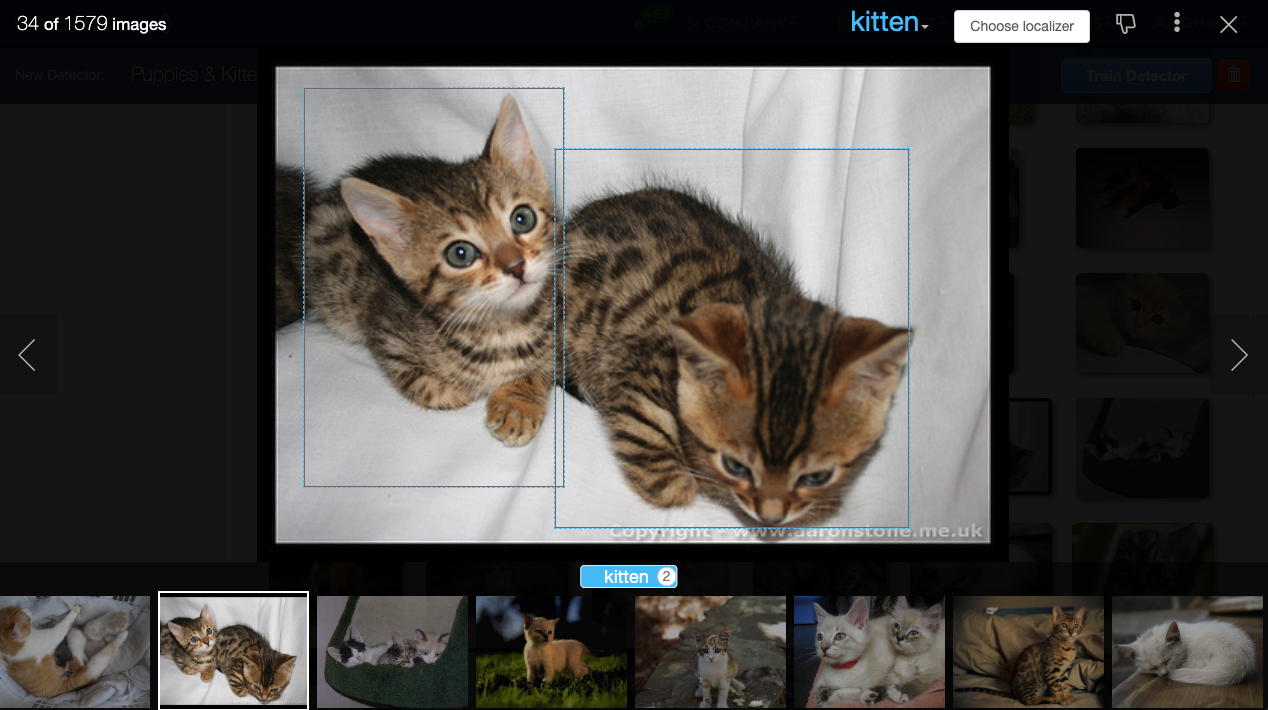
To manually annotate an image in the studio, click on the image to open the full screen view. Then click and drag to select the object of interest. You can even annotate multiple objects in the same image:
Automatic annotation
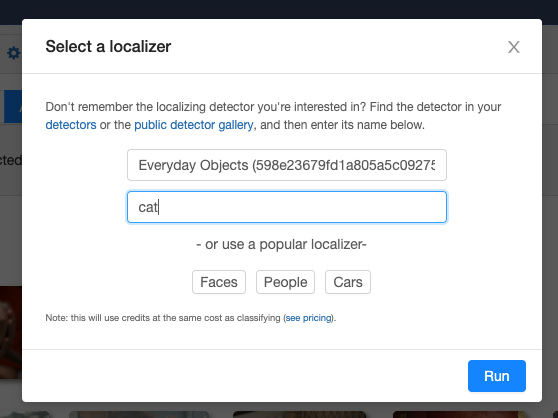
Manually annotating hundreds of training images can be a laborious process. To speed things up we’ve added an automatic annotation feature that lets you use an existing localizing detector to annotate training images. Just click on “Choose localizer” at the top of the page, and then select one of the common labels or choose a detector and label to annotate your images:
Click on “Run”, and in a matter of minutes all of the objects in your training examples matching the label will have bounding boxes around them.
This is particularly useful when you have a localizer for a general class of objects, and you want to create a detector for specific classes. For example, you might use a cat localizer to annotate training images for a cat breeds detector, or you might use a car localizer to annotate images for a car types detector.
Best practices
It’s worth reiterating: your detector can only be as good as its training data. Here are some guidelines for keeping you on the right track:
Use as many training images as you have available.
The number of training images it takes to train an effective detector can vary widely depending on what type of detector you’re creating and what you’re trying to detect. You might only need a couple of examples for a facial recognition detector, but it could take thousands of training images to make a localizer for an uncommon object.
We do have a recommended number of images for the labels for each detector type, and you can see your progress towards those recommendations at the top of the studio:

Note that meeting these recommendations does not guarantee good detector performance; it’s always best practice to train your detector, test it out, and add more training images if needed.
Include training images similar to what the detector will be used for
You’ll get the best results when your training images are similar to the media you’re detector will be used to classify in terms of angle, lighting, resolution, etc.
For example, if you’re going to be using a camera on top of a building to look for cars from above, your training images of cars should also be taken from an elevated angle. This is where importing training examples from stream recordings in the studio can come in handy — if you’re training a detector to monitor a specific camera, train it on examples that camera has already seen.
Annotate your training images
Telling your detector which parts of your training images to focus on during training can make your detector much more accurate. Take advantage of the auto and manual annotation tools mentioned early to make the annotation process as smooth as possible. Note that annotations are required when you’re training an object localizer, but they’re also recommended when creating a natural imagery classifier.
Take the first step towards you next great detector by creating a great curated training dataset on Matroid!
Building Custom Computer Vision Models with Matroid
Dive into the world of personalized computer vision models with Matroid's comprehensive guide – click to download today